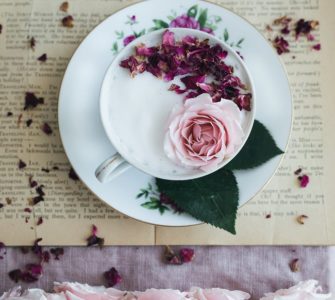
I first got into kombucha some years ago at a little yoga festival in the gorgeous English countryside (meaning, it rained the whole time so we hid in tents and drank kombucha)! Now of course kombucha has taken over the world, so it makes sense I wanted to bring you a DIY rose kombucha recipe! It’s a splash of sugary rose goodness and kombucha is so good for your health, too!
Kombucha is a delicious fermented fizzy tea beverage, known well for its amazing health properties. It is probiotic and aids your gut flora, replacing bad bacteria with good bacteria. In turn, this helps digestion, weight loss and is anti-inflammatory. Rose kombucha has all the properties of kombucha coupled with the properties of rose petals – it’s antioxidant and tastes great!
Disclosure: This post may contain affiliate links, which means that we may earn commission from qualifying purchases at no extra cost to you. Learn more.
Making rose kombucha at home is super easy. You need to complete three separate steps. First, SCOBY must be created, which is a symbiotic culture of bacteria and yeast. After that, you need to make the kombucha via the first and second fermentation.
You can easily create SCOBY by making sweet black tea and fermenting it for 1 to 4 weeks until a 1 – 2 cm film has developed. Afterwards, create basic kombucha by making more sweet tea, combining it with SCOBY tea and adding SCOBY. Ferment this for 6 to 10 days. Finally, second fermentation uses pre-made kombucha to which you will add rose petals, rose buds, honey and red berries, Stir well and allow for carbonation to take place during 3 to 10 days.
If your rose kombucha is flat, try extending the second fermentation, using fermentation bottles, or keeping your kombucha fermenting in a warm room. Enjoy this lovely DIY rose kombucha recipe!
Table of Contents
What is kombucha?
Kombucha is a fermented tea, usually made from sweetened tea and cultured with bacteria and yeast. This unique, symbiotic culture blend helps convert the sweetened tea base into a sour-tasting, fizzy drink over time.
What is so good about kombucha is that it is used as a natural probiotic. Probiotics aid the health of your gut flora, as they are usually found in consumables such as yoghurt. They contain thousands upon millions of different microorganisms which help you digest more easily, soothe tummy aches, and even fight off bad bacteria, which keeps you and your natural gut microbiome healthy.
As kombucha has alcohol content of below 0.5% and is a byproduct of fermentation, it is generally not considered an alcoholic beverage, and is often offered as a replacement for beer.
Is rose kombucha good for you?
Kombucha is very good for your health! It basically contains all the good properties of your regular 4 o’ clock cup of tea, with the added effect of healthy bacteria to the mix! Rose kombucha also contains all the properties of rose petals, such as antioxidants, which are fight off the damaging free radicals in your body that contribute to aging and diseases.
Kombucha is a great source of probiotic microbes
Considering that yeast and bacteria are added to kombucha and allowed to ferment over the course of a week, the resulting beverage is filled with beneficial microbe colonies. Don’t worry, it’s not as yucky as it seems. In fact, floral kombucha drinks such as the lovely rose kombucha or hibiscus kombucha are known for delicious taste. While you enjoy the sweetness of the drink, the bacteria are helping your gut stay healthy, digest better, and even lose some weight!
Kombucha is anti-bacterial
Just another property kombucha shares with rose water – it is pretty great at eliminating bad bacteria. The acid which is a fermentation byproduct of kombucha is pretty amazing at flushing out bad bacteria and allowing good bacteria to take their place in your gut biome. Additionally, if you have spent time fighting the Candida bacteria, kombucha is great at stopping infection and clearing up pre-existing yeast infections brought on by bacteria imbalance.
Kombucha promotes overall wellbeing
Kombucha made with roses and green tea is considered to be one of the healthiest, as it contains polyphenols and is in turn full to the brim with anti-oxidants. If you need to lose a couple inches off your waist, want to regulate blood sugar and cholesterol, burn more calories, improve the condition of your lives or even prevent cancer – kombucha has you covered!
How To Make DIY Rose Petal Kombucha!
Generally, when starting to make kombucha, there are two main steps to follow.
These are called first fermentation and second fermentation.
First fermentation is the step which occurs when you turn the tea base of your choice into actual kombucha.
Second fermentation is the step in which you add sweetening to the kombucha as well as flavour.
In this second step, you carbonate the kombucha and turn it from basic kombucha to rose kombucha by adding rose petals for both the final taste and colour.
Therefore, if you’re looking to make rose kombucha, you need to go through the process of making regular kombucha first, after which you can proceed to make rose kombucha or any other floral kombucha out of it.
How To Make A Kombucha Base
If you want to create homemade basic kombucha from scratch, know that it has two steps you have to follow and allot time for.
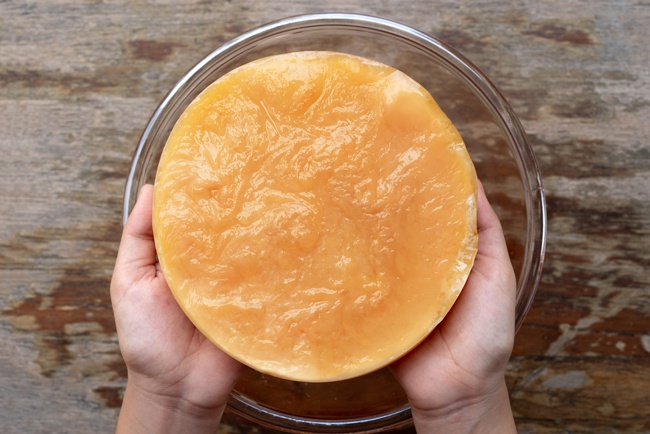
First of all, you need to make SCOBY ( this stands for symbiotic culture of bacteria and yeast, or mother of yeast). It is a gooey form created out of lactic acid bacteria and acetic acid bacteria and serves as the base of each and every kombucha drink.
Creating SCOBY is a process than can take 1 to 4 weeks.
The final step in making basic kombucha is first fermentation.
First fermentation can take 6 to 10 days and it will make the uncarbonated kombucha.
Best DIY SCOBY recipe
Symbiotic culture of bacteria and yeast is an unmissable part of making kombucha – you can’t get out of creating this gooey microbe colony! This is the part that not only starts up every kombucha batch you make, but it is the part to which the best health effects are tied.
What you need to make SCOBY
- 1.5 L water
- 100 g organic cane sugar
- 4 to 5 bags of tea of your choice (black tea works the best)
- 250 mL unsweetened, unflavoured store-bought kombucha (yup, you need to have kombucha to make kombucha!)
- 4 L glass bottle
- large cheese cloth
How to make SCOBY
- First, start with making sweetened tea. In a deeper pot, bring tap water to a boil. After it reaches boil, remove it from heat source and add sugar of your choice (white, brown, organic cane…). Mix well until it dissolves completely. Place the pot aside, place all tea bags inside and allow to steep until it has completely cooled to room temperature (or for at least 30 minutes).
- Next, start your SCOBY. Pour the room-cooled sweetened tea into the glass bottle you previously prepared. Add the store-bought kombucha inside, and make sure you include all contents out of the bottle! The pre-existing bacteria will do great to start up your new batch of kombucha that much faster.
- Additionally, cover your open glass bottle with a thick cheese cloth. Make sure to layer it on, as you need the glass bottle to be covered to ensure no dirt will fall in, and no bugs will go for the sweet tea. The glass bottle needs to stay open, to allow some passage of air. Secure the cheese cloth tightly around the mouth of the glass bottle, tying with rubber bands or hair ties to ensure it will not move.
- Finally, allow your SCOBY to ferment. Leave the glass bottle in a dark place, at room temperature and preferably do not move it for at least 1 week, but ideally up to 4 weeks. You need about 1 cm to 2 cm of SCOBY to form during this time. Allow SCOBY to rest in the liquid once created until the time you are ready to start making basic kombucha. To start with your SCOBY will look like a big jelly-like blob!
How To Make Kombucha SCOBY Last Longer
SCOBY can last up to 6-9 months if you are careful about how you treat it!
When making your kombucha scoby, make sure to NOT use decaf tea when making SCOBY the first time around. SCOBY needs the caffeine from the tea, which is why black tea is a must starter choice.
Furthermore, if you wish to use green tea or flavoured tea with your kombucha, do this once SCOBY has already grown in size and you’re about to go through first fermentation. Starting SCOBY with green tea is a bad idea, as it generally lacks the necessary caffeine to grow SCOBY fast.
Additionally, don’t put SCOBY in the fridge!!! Your food preservation instincts are probably yelling at you to store perishables in the fridge, but just like all fermented thingies, SCOBY is best left in its native liquid in a fermentation setting. Dark, damp, room temperature and covered is perfect! You can place your SCOBY in the fridge in dehydrated form.
Use glass rather than metal to both create and preserve SCOBY, as metal can cause undue reactions you do not want to be drinking.
Finally, you can use honey as sweetener, but only in the SECOND FERMENTATION. The bacteria in honey and SCOBY are not compatible, until two fermentation steps have already occurred. Stick to white or brown sugar when making SCOBY.
How to create basic kombucha through first fermentation
First fermentation is the step which creates basic kombucha which will, in turn, become rose kombucha in the second fermentation step. To begin this step, you need pre-made SCOBY.
What you need for the first fermentation of kombucha
- 3.5 L water
- 200 g white sugar
- 8 bags of tea of your choice (black, flavoured, fruity, green, rooibos)
- 500 mL SCOBY residual tea
- all of SCOBY the previous step created during the 1 to 4 weeks
- 4 L glass bottle
- cheese cloth
How to make kombucha through first fermentation
- Again, start off by making sweetened tea following same instructions as for SCOBY. In a deeper pot, bring tap water to a boil. After it reaches boil, remove it from heat source and add sugar of your choice (white, brown, organic cane…). Mix well until it dissolves completely. Place the pot aside, place all tea bags inside and allow to steep until it has completely cooled to room temperature (or for at least 30 minutes). IT IS IMPORTANT THE TEA COOLS FULLY TO ROOM TEMPERATURE AS HOT TEA WILL KILL SCOBY.
- Wash your hands thoroughly and pull out the SCOBY layer from your pre-made liquid bottle. Take about 500 mL of the residual tea SCOBY was growing in, and put it aside for now. The rest can be thrown away.
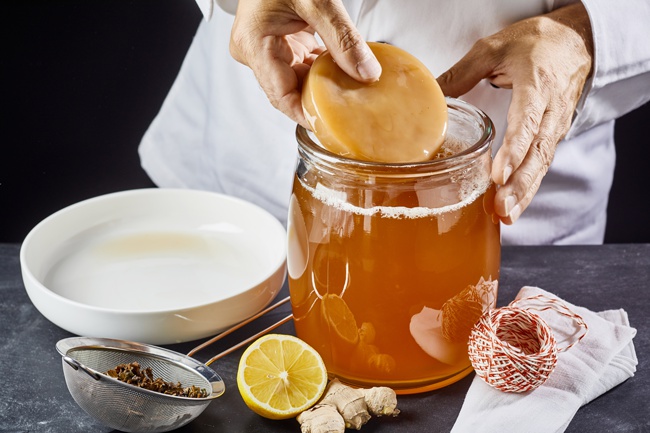
- In a glass bottle, combine freshly made and fully cooled sweetened tea, then add SCOBY residual tea you kept aside. Finally, place SCOBY into the jar.
- Again, cover the mouth of the glass bottle with several layers of thick cheese cloth and secure fully with rubber bands or hair ties to allow some air, but prevent dust, debris and bugs.
- Finally, it is time for the first fermentation. Again, bring your glass bottle to the same dark, room temperature conditions and leave it be for 6 to 10 days. Ferment for a shorter time (6 days) for a sweeter tea. If the room temperature is warmer than 21 degrees Celsius, take notice that fermentation will occur faster. Sample the tea daily after 6 days have passed to make sure you stop the fermentation when the taste suits you best.
How to make DIY rose kombucha
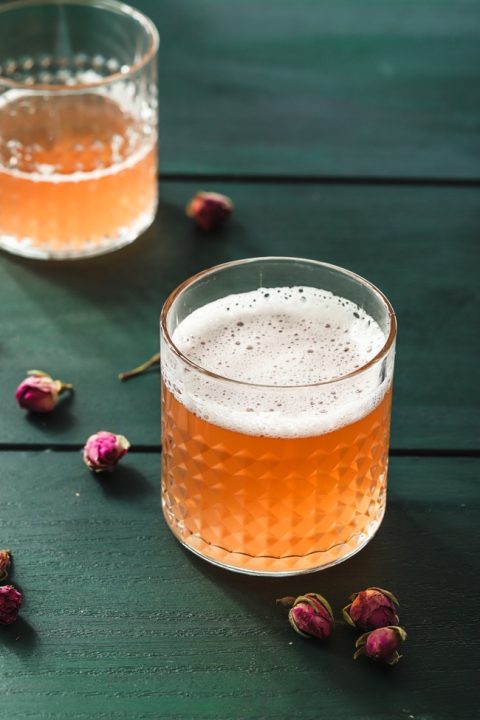
Making rose kombucha entails only one and final step – the second fermentation. This is a step where you flavour, sweeten and carbonate your tea the way you like it best. We will do it with roses, of course!
What you need for your DIY rose kombucha recipe
- 2 L kombucha (this is kombucha that has passed the first fermentation step – green tea, black tea or hibiscus tea are great first fermentation step bases that go well with rose kombucha)
- 10 – 15 g dried rose buds or rose petals (be careful that they’re organic and made for consumption instead of skincare, you can usually buy this at your local tea shop)
- 10 to 12 frozen cherries, strawberries or raspberries (fresh or thawed, mash to give the lovely colour and sweet taste to rose kombucha)
- 3 to 4 teaspoons sugar or honey for sweetening
- 3 to 4 fermentation bottles – you need this as they have an airtight seal!
How to make DIY rose kombucha – the recipe
- Allow red berries to thaw fully and mash them to a paste. Pour 1 tablespoon of rose petals into each fermentation bottle. Place 1 teaspoon sugar or honey into each fermentation bottle. Finally, divide the berry paste into each fermentation bottle in equal parts. Top up each fermentation bottle with 500 mL kombucha, making sure to leave about 4 to 5 cm of space at the very top. Close the bottles.
- Again, ferment the kombucha for the last time. Place in a dark spot at room temperature for 3 to 10 days. This process will begin carbonating the kombucha, and after the 3rd day, you should check daily if the fizziness is to your liking. Leave to ferment for longer for more intense fizziness.
- Enjoy your wonderful rose kombucha drink with some ice! You can chill it in the fridge before serving, or you can strain it away from berries and roses. It is perfectly fine to enjoy as is! Make sure to enjoy your drink, as it can be kept in the fridge for up to 4 weeks.
Tips to prevent your rose kombucha from becoming flat
Follow these tips for a wonderfully refreshing fizzy bottle of rose kombucha (we all know nobody really likes it flat)!
- Use fermentation bottles and not mason jars you have lying around. While it might look cute, you really need that airtight seal for your best fizzy batch!
- Keep your first fermentation not under 6 days long, but not over 10 days long! Bacteria and yeasts need to build up from SCOBY in a way that is sufficient to create carbonation in the second fermentation. However, fermenting for over 10 days makes kombucha rather sour. You need some of the sugar to be left over for the carbonation.
- Make your second fermentation longer than 10 days! Don’t open your bottle every day, but opt to check every two days if the fizziness is to your liking. Be fast opening and closing the fermentation bottles!
- Your room might be too cold. Fermentation occurs best when temperatures are 21 degrees Celsius or above, so make sure room temperature is adequate by heating the room if necessary.
- Stir the kombucha well before bottling! You need to mix in the oxygen with the bacteria and yeast if you want to start up the carbonation process on the right foot.
Don’t you just love a great DIY rose kombucha recipe? This one is a labour of love, and soooooo many Pins on my Pinterest page! I promise – this DIY rose kombucha recipe is nothing like you’ve tasted before. I just can’t go back to regular kombucha anymore! Have you made any yourself yet? If you’re more of a hot beverage fan, head here for our special rose petal tea recipe.
