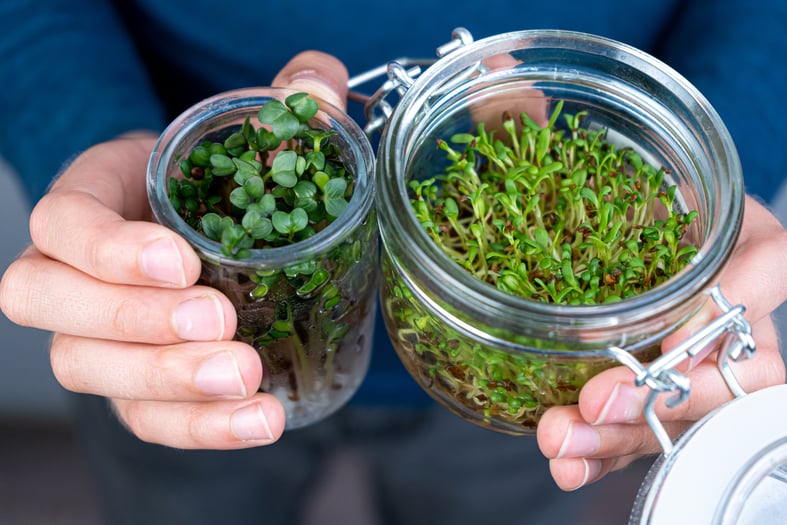
I have a fun way to grow microgreens right at home. It may look complex, but it’s super easy and highly portable. Grow them at work, in the car, or take them along on vacation for an ample supply of clean greens!
Disclosure: as Amazon Associate we may earn from qualifying purchases. Learn more.
Table of Contents
Recap: What Are Microgreens?
Microgreens are the newly sprouted leaves that grow from various germinated vegetable seeds. These tiny, tender leaves are packed with nutrients and are eaten alone, used as a garnish or an ingredient in salads. The life cycle of microgreens is often short because of harvesting; however, some species will regrow after harvest.
Growing Microgreens In A Jar
The novelty of cultivating microgreens in a glass jar isn’t something new. However, more unique ideas on this form of indoor gardening have emerged. There’s nothing more satisfying than watching the fruits of my labor grow before my eyes as seen through a clear glass jar.
So, just where does a microgreen gardener start with such an endeavor? I have taken the guesswork out of accomplishing this fun project by providing each step. Come on, let’s get started!
Things To Consider
When I entertained the notion of “microgreening” from jars, I made sure I read up on this form of gardening. The last thing I wanted was to invest time and money into a project, only to have it fail. There’s a ton of information online that’s just waiting to be gobbled up by information-hungry gardeners like myself, so I got to work.
What Type Of Microgreens Do You Want To Grow?
One of the most important steps in growing microgreens is to purchase the right type of seeds. I like to cultivate various types of microgreens. Some regrow while others are spent after harvesting. Microgreens that regrow have a few drawbacks that I will point out.
Microgreens focus their energy on the first sprouting of tender leaves. That energy is a one-time shot for many species of microgreens which is why they don’t reproduce again. However, there are some that will regrow, such as basil, beans, coriander, sage, peas, oregano, fenugreek, and kale.
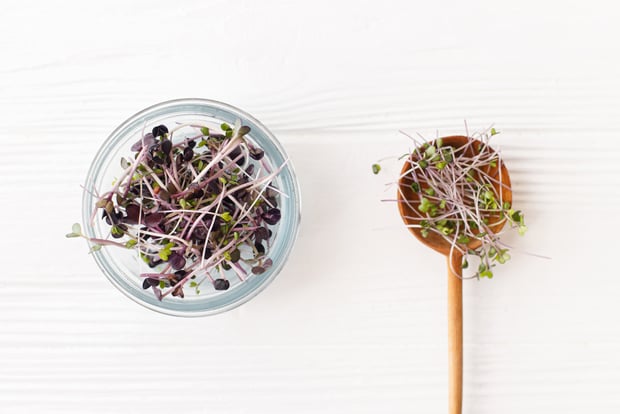
After one harvest, these particular microgreens have nutrient and taste degradation. I discovered that essentially I was eating the stem regrowth rather than the tender leaves, and of course, the stems tend to be tasteless.
So, deciding on a single or multiple harvest microgreen species is the first step. I like to go with single harvest species rather than compromise on taste and nutrients in multiple harvests. Here are some microgreen species I highly recommend!
- Arugula, Slow Bolt
- Basic Salad Mix
- Basil, Cinnamon
- Basil, Genovese
- Basil, Lemon
- Basil, Red Rubin
- Broccoli
- Chard & Beet, Rainbow Sprinkles
- Cilantro, Monogerm
- Cress, Cressida
- Dill
- Kale, Kalefetti
- Lemon Balm
- Mild Micromix
- Pea, Speckled
- Radish, Confetti
- Radish, Rambo
- Scallion
- Shiso, Britton
- Spicy Salad Mix
- Watercress
Toxic Microgreens To Avoid
I learned from a well-versed microgreen gardener to avoid attempting to grow microgreens from tomatoes, peppers, eggplants, and potatoes. As a microgreen gardening beginner, I was unaware that these plant species produce dangerous levels of alkaloids that are toxic when consumed.
Can You Grow Microgreens In Any Container Or Just Jars?
Microgreens are relatively versatile. They grow well in trays, jars, soil or water, stackable planters, or other small vessels, providing it allows ample drainage and is free from bacteria and other harmful chemicals.
I often get asked why I use glass jars for growing microgreens rather than plastic. Because I am a planet-friendly gardener, I like to use reusable containers. Plastic presents the issue of potentially harboring bacteria and, over time, tends to degrade. I also like to use containers intended for consumable gardening free from any chemicals. As far as safe options, I go with either glass or ceramic.
There are several options for sprouting jars. A complete kit with everything included makes it convenient and easy to grow microgreens. I happen to have leftover mason jars, so all I needed was special lids for sprouting microgreens.
How To Sprout Microgreens In A Jar
Trying to visualize growing microgreens inside a jar is difficult. I figured this out real quick once someone pointed out that daily rinses with water caused the seeds inside the jar to sprout and grow. So just how do you sprout microgreen in a mason jar?
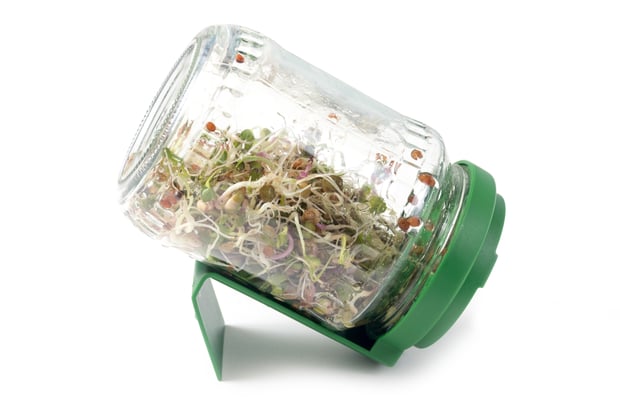
Things Needed:
- Wide mouth mason jar(s) with a screw-on rim.
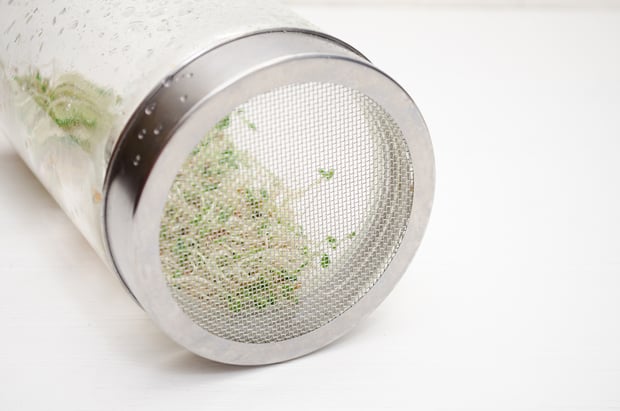
- Screen material to replace the lid.
- Alternatively, an all-in-one screen lid can be purchased.
- Materials to use for DIY lid screens include plastic needlework canvas or a wire screen. Use the lid portion to trace a circle on the screen material. Cut the screen material and place it in the jar rim.
- Seeds (organic) intended for microgreens
- Filtered water
Directions
- Sterilize the mason jar, screen, and rim to avoid bacteria from forming.
- Place a few tablespoons of seed into the jar.
- Screw the rim (with the screen in place) onto the jar.
- Fill the jar with filtered water to about ¼ full.
- Allow the jar and seeds to sit in the water overnight.
- Pour the water out, simplifying by turning the jar upside down. The water runs out of the screen lid.
- Place the jar of wet seeds on a sunny window sill so it can get light.
- Each morning repeat steps 4-7 until the microgreens are tall enough to harvest. Harvesting microgreens can be done once the tender leaves have formed.
- Once all of the tender leaves have been harvested, discard the spent greens.
- Start the process over again to enjoy another fresh batch of microgreens!
Do I Need To Angle The Jar After Draining The Water?
When I first began to research growing microgreens in a jar, I noticed there were stands included in numerous jar kits. I discovered that these stands (that resemble a cookbook stand or easel) served to hold the jar of microgreens at an angle to allow water to drain out of the jar after giving the greens a daily rinse.
Does Microgreens Require Sunlight?
Microgreens, like any other plant, need light to thrive. Using artificial lighting or sun coming through the window helps the greens to grow. An interesting study on how light affects the nutrients in microgreens revealed lighting does make a big difference.
The Frontiers in Plant Science Journal mentions how blue/red and blue/red/green LED settings encouraged a significant increase in glucose, sucrose, and fructose in broccoli microgreens. Compared to white light, LED lighting had a positive impact on the growth and nutritional quality of microgreens.
Can You Grow Microgreens Without Dirt?
Microgreens grow in dirt or in water. The beauty of these luscious miniature greens is how well they adapt to either condition. When growing them in water, it’s important to use water with a pH of around 6. Microgreens tend to be fussy about the alkalinity of water as a medium.
Harvesting
Microgreens are harvestable when the leaves emerge (cotyledon stage.) When growing them in a jar using the water rinsing method, I don’t have to contend with washing them or cutting them at the soil line when harvesting. I simply take them out of the jar and enjoy!
Harvesting my microgreens growing in trays filled with soil is a bit different. I use a clean pair of sharp scissors (as part of my indoor garden tool kit) to cut them. To harvest the greens, I cut them just above the soil line.
Microgreens Health Benefits
The Journal of Future Foods published a study noting the powerhouse of benefits when consuming microgreens. This functional food provides a rich source of Vitamin C, copper, zinc, carotenoids, and phenols. Phenols bioactivity act as antioxidants, anti-bacterial, anti-hyperglycemia, and more.
I love to add some fresh microgreens to my salads, smoothies, or as a topping for an afternoon snack of gouda and crackers. Sometimes, I find that just a small amount of the greens alone provides a sweet, spicy, or herbaceous treat when I am in my kitchen.
Micro Isn’t Mini When It Comes To Potency
Why didn’t I think of growing these potent little greens sooner? Not only is the gardening aspect enjoyable and satisfying, I know I have a source of clean and highly nutritional greens that can’t be purchased anywhere else.
